 Let me confess this to you. When I started out, I didn’t realize how much my room was distorting what I was hearing. I kept fighting with my mixes for a long time as they didn’t translate well to other playback devices. Sounds familiar to you?
The end point is, how do you know if what you’re hearing is really true, especially if you’re a novice?
The company Sonarworks has a software called Reference 3 which can help us with that. Is it the ultimate tool? Let’s find out.
Note: Sonarworks makes 2 different versions of Reference 3. There’s the “Speaker/Room Calibration” version, which is the one I’m going to talk you about today, and the “Headphone Calibration” version. This last one is something quite new in the industry and aims to correct the frequency response of some popular models of headphones, in order to make them sound more flat and accurate, delivering us a portable reference sound. Pretty cool.
Starting With The Right Foot
Before we dive into the nitty-gritty of Reference 3, make sure you know some basics about room acoustics and all the issues we have to deal with in our home studios.
I also suggest you to add some acoustic treatments to your room; my eBook The Recording Roadmap will get you started about that. Furthermore, adding a couple of Auralex Mopads underneath your monitors to decouple them from the desk could be a smart move.
Each thing, if taken alone, won’t make a night and day difference, but all together they sum up and will help you get a better sound out of your room to begin with, way before considering any other software solution.
Why You Might Need Reference 3?
Ok, what is this thing? In a nutshell, it’s a software meant to analyze and balance out the frequency response of your room, delivering you an accurate and reliable sound.
“But, if I already have a great pair of monitors wisely placed and some acoustic treatments, my room is fine…” you may ask, right? Unfortunately not. Our rooms have not been designed to sound good and a couple of panels won’t solve all the issues. They will get you closer but there’s a point after which you can’t go. And that’s when Reference 3 comes into play.
How Does It Work?
Keeping it simple it works this way: the software analyzes your room and then calculate its correction curve.
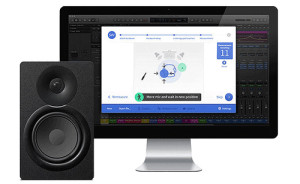
Reference 3 comes bundled with an individually calibrated measurement microphone, which is essential to analyze your room. The first thing you need to do is hook it up and launch the software to begin with the measurement phase.
Once finished, you’ll just have to insert the plugin (VST, AU, RTAS and AAX compatible) on your master channel, so that it can apply the correction to any sound leaving your DAW. Done!
Let’s Analyze The Room
After a quick setup of inputs, outputs and levels, Reference 3 determines the position of the microphone by measuring the latency between a few short impulses it fires from the speakers. Then it can easily determine distances between each speaker, listening spot and so forth…
It’s super accurate! I measured the distance between each of my speakers and they’re 143cm apart. The software measured just that, no more, no less. Other distances were perfect as well. And no problem if you place the microphone a bit off center or it reads something that’s not accurate. You can fine tune everything pretty easily.
Then the real analyzing phase starts and you’ll be asked to move the microphone around some precise spots. The cool thing is that the software will keep firing its impulses, so it always knows where the microphone is, and you can see if you’re in the right spot by looking at your screen.
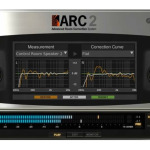
No more need to become a pro at sticking tape measure on the floor to mark down tens of positions! Yahey! As a user of the ARC 2 by IK Multimedia, I was used to do just that so, to me, this single thing is a huge time saver.
The whole measurement phase took me about 15 minutes.
Reference 3 In Action
For the first test of Reference 3 I decided to let some of my well known records pass thru it and let my ears be the judge.
I’m aware of all the issues I have in my room and Reference 3 cleared it right up and worked the way I was expecting.
The lows got tighter and deeper, the midrange more defined without being harsh and the highs got a little lift, like if they were on top of my head. I noticed some very nice improvements on the stereo image; wider and more 3D than the way I was used to with the ARC 2.
I tried Reference 3 on a couple of sessions I was working on as well and in the end both mixes translated the way I was expecting with no hassles.
As said above I was already used to a room correction software, so all of this was no big surprise to me…But if you’re new to this, the difference for you will be HUGE, trust me. You’ll notice all the low-mids mud which is common in most room disappear, everything will get tighter, punchier and easier to mix.
Handy Features
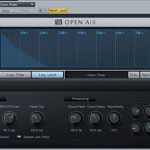
The plugin interface is clean and well organized. There’s a plot showing you the correction curve, input and output meters, the “Avoid Clipping” option which lowers the output to avoid distortion, a Wet/Dry knob and a Mono switch.
Moving on to some more technical features, you can customize the filter phase response with 3 different options, Minimum, Mixed and Linear. Each one influences latency, accuracy of the filter and CPU load, so experiment and use your ears to pick the one you like the most.
Another cool thing are the calibration limits. In essence, you can tell the software how far it can go in terms of dBs of correction and frequency extension. For example, you can set it to operate a max of ±6dB correction and stop it from going super low if your system can’t handle that. Smart thing.
Lastly, you can set Reference 3 to simulate a variety of popular speakers, like the famous NS10s, and of course you can customize the output curve to your liking. This kind of features are always useful to get different perspective on a mix.
Wrapping Things Up
If you’re a bit skeptical about spending money on room correction softwares, you’re not alone. I heard people talking about them for years before taking the leap of faith myself… But here’s the good news for you!
The smart guys at Sonarworks have decided to make a trial kit for Reference 3. For 49€, you’ll get the measurement microphone (with its own calibration file) and a 21-day fully functional trial of the software. The best of both worlds!
Then if you like it, you can get a lifetime license for 229€ (if you got the trial kit; 269€ otherwise), and if you don’t you’ll always have a great microphone which you can use for recording tasks as well (it’s an omnidirectional condenser mike, after all…).
It’s a great chance to really get a better idea on how this thing can help your mixes and improve what you’re hearing in your room. My site is here to help, but I don’t want you to take my word for granted. Even if your room already sounds good to you I bet you’ll notice some serious improvements. Give it a try and test it on your skin!
You can use it as a learning tool as well; something that will help you develop a reliable reference point, which is an invaluable thing. It will let you get better at your craft more than any other compressor emulation or new preamp, for sure. And it will somehow improve any other piece of gear you already own.
For that price it’s a real bargain and I highly recommend it!


As a user of both IK multimedia ARC 2 and Sonarworks Reference 3, which one do you feel does a better job helping your mix translate?
Good question, Jon. Thanks for asking. In a few words, you can’t go wrong with any of them. They’ll both help what you do tremendously. If I had to choose, I’d go with Reference 3 this time around for a couple of objective reasons: the measurement phase is super fast and easy (which helps a lot!), there are features which the ARC2 misses (plus the “Headphone” plugin you can always add) and there’s the trial, which let you test the whole thing without spending the whole price. Hope that helps!