With modern computers, virtual instruments have become more and more valuable and important, especially for all the home studio guys like us, so it’s important to know how to deal with them.
Today’s post is dedicated to answering one of my readers, Josh, who asked me a question concerning that subject.
Here’s what he wrote to me:
I’m printing a software instrument and I was wondering if I should treat it the same as if I was recording an acoustic instrument
A Step Back
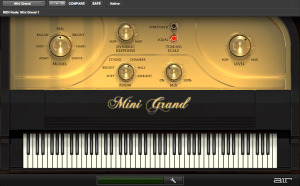
Okay. Let’s try to get some clarity out of this. You want to write a part with one of your favorite virtual instruments (let’s say a piano…), so you load it on one of your channels within your DAW and start playing/recording using your MIDI keyboard controller, right? When finished, you get a MIDI track that tells the instrument which note should be played, and the instrument will give you exactly what you played and recorded before.
But now, let’s say you need to to share your session with somebody else, or you just want to free up some resources in your computer… You’ll need to print that track and export it as an audio file (as MIDI is not audio), but how should you treat that software instrument when you’re going to record it? Should you record it as it comes out of its channel and don’t care about it, or should you apply the same rules you’d apply if it was a real piano?
Now that we have an overall vision of the subject, we can try to answer Josh’s question.
Here Are My Advices
Record it exactly the same way as if it was a real acoustic instrument.
Think about this: for your DAW it is nothing but another track!
When it will playback alongside the rest of the mix, your Pro Tools, Cubase, Logic or whatever will see it the same exact way as if it was a real audio file playing. It will feed your plugins exactly the same way, will crowd the mix buss exactly the same way, will make your speakers move exactly the same way and so on… If your computer is dealing with it as if it was just another track among the others, why should you record it in a different way?
How To Record It?
The process is fairly the same as if you were recording a real source with a microphone.
Just follow these 3 steps and you’ll be ok:
- Create a new audio track and set it for recording what’s leaving the bus of your virtual instrument
- Check and adjust the levels of your virtual instrument so that they’re averaging (not peaking!) around -18dBFS
- Record your track and voilà!
If the signal coming from your virtual piano is too hot, the best choice would be to lower it right from inside the software instrument, but you can even use some kind of trim plugin after that if you feel more comfortable that way.
As explained in my free eBook “The Recording Roadmap”, just keep your recording levels around that conservative -18dBFS value on average. There will be much more free space (headroom) above your tracks, they won’t clip and they’ll feed your plugins in their “sweet spot”.
This trick will cost you nothing but your work will be easier and everything will sound better! And that’s the whole point of our game, isn’t it?

