 “Convolution reverb is a process used for digitally simulating the reverberation of a physical or virtual space. It is based on the mathematical convolution operation, and uses a pre-recorded audio sample of the impulse response of the space being modeled. To apply the reverberation effect, the impulse response recording is first stored in a digital signal processing system. This is then convolved…”
Is your head hurting? Ok, it’s a bit tricky, but the truth is that we don’t need to know the whole definition from Wikipedia and all the tiny details to make use of this technology.
Today’s post will hopefully give you what you really need to know about Convolution and IRs and get you started in minutes.
In Essence
With convolution and IRs you can make a model of the way a room sounds and store it in a file you can then use at your wish to apply that same “acoustic behavior” to your tracks.
I like to think at IRs as an “audiography” of a space, a precise and static snapshot that represents the behavior of sound waves within that environment. Instead of using a camera, we use a microphone; instead of dealing with light waves, we’re dealing with sound waves.
Step 1: What Is An Impulse Response (IR)
In a very few words, you use a loudspeaker to play an impulse (usually a very transient-heavy sound or a sweep) inside a room you want to capture the sound of and record the result (the response of the room) with all the natural reflections and reverb tail, ending up with a WAV file.
Of course, the better the room, microphone choice and placement and things like that are, the better the IR will come out (and so the better sound you’ll get in the end). That’s why many convolution reverbs are so expensive, because it takes a lot of time and efforts to make faithful IRs.
Making Impulses Of Gear
A cool thing about this technology is that not only you can capture sonic snapshot of reals spaces, but you can adopt the same procedure to capture the response of both analog and digital hardware units (and even plugins).
For instance, you can get the IRs of that specific digital reverb unit you like. The IR won’t likely be 100% faithful to the original, as with algorithmic reverbs there are many variables involved (some of which are randomic), but you’ll get pretty close by no means. I think it’s a good compromise.
Note: Be aware that if you’re capturing the IR of an EQ or preamp or compressor, let’s say, you’re only taking a snapshot of its frequency response, not its non-linearities or harmonic characteristics. That requires even more complex dynamic convolution algorithms.
Step 2: The Convolution-based Reverb
Ok, now that your IR is ready, you’ll need to use what’s called a Convolution Reverb. It will process the IR and let you use its sound (remember, the sonic-footprint of a specific space) within your session, the same exact way you’d use any other reverb plugin.
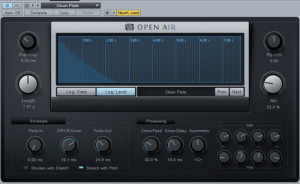
It’s a lucky day for all of you Logic Pro, Cubase and Studio One users out there, as those DAWs comes already bundled with great convolution-based reverbs, Space Designers, ReVerence and the new Open Air in Studio One 3.
(Seems that only Pro Tools is missing something here…Avid, do you copy?)
So if you’re doubting on which DAW to choose, maybe knowing this thing will help you…
Meet LiquidSonics’ Reverberate
For all of the others my suggestion is to get a plugin called Reverberate from LiquidSonics. It’s a very powerful hybrid between a convolution and an algorithmic reverb.
This means that you’ll not only be able to load your own IRs, but you’ll even get a load of other cool options to deeply shape your impulses as you’ll do with any standard reverb.
But the very good news thing is the pricing… It only costs around 50$ for Core version and around 80$ for the Full one, which is far less than many other convolution reverbs. If you’re looking for an affordable Convolution Reverb, that’s the best bang-for-your-bucks for sure
Whatever is your choice, every convolution reverb will come loaded with tons of impulses, ranging from old french churches to high indian temples, so you’ll be pretty covered.
Convolution Or Standard Reverb?
The answer is pretty simple. If you really want the sound of a specific space (be it a ballroom or your toilet or whatever), convolution is the only way to get it, as the impulse will most likely give you the most faithful representation of that space.
Other standard algorithmic reverbs can give you amazing sounds for sure, but will never give you THAT specific sound you’re after, as their not coded to replicate that specific environment.
So, using a convolution-based reverb might be a good idea if you want to put a unique sonic-print on your recordings. You can get weird IRs all over the web (or even make your own), tweak them and get creative in a different way.
The biggest downside of IRs is that they are static (remember, they’re snapshot), while the coding within algorithmic reverbs makes them dynamics, giving the reverbs some life and movement in the end, and this can contribute to adding vibe to your song.
Jump In!
In essence, there are pros and cons with both things. All you have to do is pick the one that suits your music best. In some cases convolution will sound amazing, in some others not, and viceversa. Use your ears and don’t let the technology fool you.
Are you going to jump on the convolution train? Or maybe you’re already addicted to it? In any case, what are the sounds that you want to try next? The inside of the Taj Mahal? The Boston Symphony Hall perhaps? Share your thoughts with a comment.


Congratulations for this beautiful site about music.
Being also a professional of the sector, I find your site very interesting 🙂
Dany
https://www.pytaudio.com/en
Thanks for checking it out!