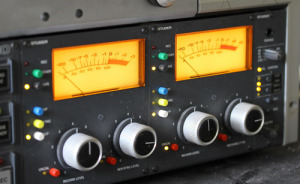
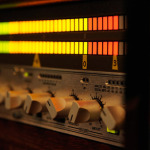
 You know that guy with the moving needle found on every piece of analog equipment, right? Well, that’s a VU meter.
It’s one of the first devices introduced back in the analog days to measure and display the intensity of signal levels in audio equipment, making it possible for recording engineers to hit the recording tape (and any other analog unit) in its “sweet spot”. That was (and is) vital to keep noises as low as possible and get the best recording.
With the advent of computers and digital recording, however, we moved to different metering systems and scales in our DAWs, who are unfortunately telling us only one side of the story.
We partially forgot about the VU meter and how helpful it is, especially when setting levels…
So today, let me break it down for you. Read this and discover how powerful the VU meter is.
Different Ways To Tell The Same Thing
At its heart, sound is nothing but electricity. We can measure it in many different ways, while telling the exact same thing each time. It’s just a matter of language and context.
The meters inside our DAWs work with a unit named dBFS (meaning dB Full Scale), while every VU meter works with another unit, named dBVU (meaning dB Volume Units).
Both of them are displaying a representation of the signal level but there is a huge difference: the first are peak level meters while the latter are average level meters.
They’re both telling you the truth, just from 2 different perspectives (a bit like your ex girlfriend/boyfriend does). But what does it mean exactly? How can you understand them?
Peak Level VS RMS Level
In digital, 0dBFS is the top of the scale, the point of no return.
If your signal crosses that value, it will be brutally “truncated” and digital clip will occur…
The result is nasty unpleasant distortion. Just avoid that.
Peak level meters are useful in that sense.
In simple words, they tell you: “I’m reading this peak value at this moment, man! Now it’s up to you to make sure it is below that darn 0dBFS…”. They tell you how loud music is for the computer; a raw number to tell you if you clipped, but absolutely nothing more than that.
Conversely, because they can’t display instantaneous peak levels (they’re not that fast!), VU meters are giving you an average of what they’re reading, displaying what’s called the average level (RMS level) of the signal. It’s a just like averaging many different values (remember that math back in the high school?). This averaged level give us a good approximation on “how loud” the music really feels, and that’s much more helpful.
So, to summarize, the peak meter in your DAW reads momentary peak levels, while a VU meter reads an averaged level. Two completely different beasts. Stick this in your head.
Learn more on this subject with my eBook “The Recording Roadmap”. Get your FREE copy!
Here’s an excerpt:
“When the all new concept of “digital” came in […] they started to set everything based on the peaks and recording as hot as they could, thinking they’re doing the same thing they did for years with their trusty analog gear… Unfortunately, that’s a huge mistake […]”
A Matter Of Calibration
Every VU meter needs to be calibrated.
This means you’ll need to tell it which (digital) level in dBFS will be its reference point for 0VU. When recording and mixing, you should calibrate your VU meter to -18.
Why? Because doing so, when your signal hovers around -18dBFS on your DAW’s meters, the needle of your VU meter will jump around 0VU. I know, it seems complicated, but it isn’t, indeed. Read it again and you will get it.
Some meters come already calibrated to a specific value and can’t be customized. In that case, read the manual to discover which is the level the meter has been calibrated to. If it is -18, then you’re fine. If it’s not, my advice would be to look for another VU meter.
The Klanghelm VUMT I’m suggesting you in my eBook “The Recording Roadmap” will give you all the options you need for less than 10$. It’s really awesome. Put it on your to-buy plugins list.
How Can You Benefit From Using It?
A-ha! That’s the whole point of the article. Sorry if it took so long, but I wanted to be as clear as possible on this subject (and hopefully I’ve been!).
I find using a VU meter very useful especially when recording, as I can set my levels by just watching at the needle, skipping the meters in my DAW and the need of averaging their peak levels by eye, and being sure I’m gain staging everything right! Huge deal.
As said above, with the VU meter properly calibrated, when the pin hovers around 0VU, I know my incoming signal is averaging around -18dBFS (sometimes higher, sometimes lower, it’s an average) and that’s the old good sweet spot for recording. You just can’t be wrong with that and you won’t be fooled by the meters of your DAW anyhow. You won’t feel the need to push the signal harder to get a higher level on the scale and things like that… Your recording levels will be ok, by just setting them while reading a VU meter.
Note: If you want to use the VU meter to monitor all of your tracks, but you want to save some CPU, you can easily set it on an aux track, assign a bus to it and then send whatever track you need to monitor to that bus. No need to load a meter for each track.
It comes very handy during mixing as well.
Say you want to use a plugin that emulates an old 1176 compressor (for instance, the BF76 that comes free with Pro Tools). You can set it to show you the input signal level, then trim that level (boosting or padding it) till the needle starts hovering around 0VU. Doing so, as for recording levels, you are hitting the plugin right in its sweet spot, roughly the same spot engineers were hitting the real unit back in the days.
Do you know what this means, in essence? All the bundled presets will work and sound better without tweaking them and the overall plugin will sound better as well.
You can do a similar thing to keep some coherence between all the track levels within a session. You can easily do this by setting the plugin to display the output level, reading the output of each track and trimming its value so that it’s hovering around 0VU.
Note: Another cool thing you can adopt is to put the VU meter on your master channel and make sure to gain stage the whole session around 0VU. Doing so you won’t crowd the master bus and you’ll even feed any eventual plugin you’ll use on the master (tape machines?) with the right level.
Seriously, Don’t Skip This
I know this subject is not as sexy as, let’s say, parallel compression or EQ tricks, but let me tell you is probably way more important. So, don’t skip it. Follow my suggestions on your next project and experiment with the VU meter. After a while, it will become part of your workflow, you’ll feel at home with it. It’s a promise, you’ll love it!
A good gain staging is key to work better, faster and get a great sounding mix in the end.
And it’s fair to say this old-school way is even cooler and smarter than the modern-way.
All the top guys are doing the same! Why don’t you jump on that train as well?

![Printing Virtual Instruments To Track [Reader’s Question]](http://www.recording64.com/wp-content/uploads/2014/07/mini_grand-150x150.jpg)
![From Mixing To Mastering – How To [Reader’s Question]](http://www.recording64.com/wp-content/uploads/2014/10/mixing_desk500-150x150.jpg)


hi! i have the klanghelm VU meter how i can calibrate? i have the baseline peak at -7.5 db so what i need to do with the VU to calibrate? i must use the trim of the klanghelm and put it to -10.5? or what? i cant understand how to calibrate sorry. thanks
Hi, kim! I use the Klanghelm VUMT as well. To calibrate it, use the CAL field just on the side of the left TRIM knob. My suggestion is to set that to -18. And that’s basically it for what concerns the plugin. Now check your levels while working and make sure the needle hovers around 0dBVU (it can go a bit over on louder sections). Note: beware that the VUMT behaves as any other VU meter, so it is not fast enough to read quick transients. So, for kick, snare and drums in general, look at the peak level with the meters in your DAW and keep it around -10/-6dBFS on louder transients. Thanks for sticking around.
That is an excellent article, Fab. I’ve been working for someone to explain that to me in easy terms for ages. Thanks very much! Jim.
Thanks a lot for your words, Jim! I’m really glad it helped. It’s a powerful concept, and once nailed it changes the way you approach audio recording and signals in general.
Great article ! Thanks for posting this , one thing I’m uncertain is that , not everyone’s sound device is referenced at -18 , some are -20 , -18 , -16 , -14 , -12 ect . I’m guessing itb it don’t matter really , but for recording it should matter because your adc’s and dac’s have a set reference level . So my question is do I still aim for -18 even if my Apollo x16 uses a different reference alignment?
I faced this same question years ago and, to my knowledge, you’re correct! I owned a first gen Apollo Silverface for a long time, and that was set to -16, too. From an academic standpoint, that is the calibration level of your interface and could be the reference average level you should aim at while recording. In a real world situation, though, it’s an average and there’s no need to be THAT picky in my opinion. Just make sure you’re around that spot and you’ll be good. The benefit of using a VU meter (or an RMS meter) is to get a different read on the signal (peak VS RMS) so that you know roughly where to set your gain based on how the incoming signal changes over time vs a single peak. Thanks for getting in touch. Glad you liked the article.